Pressing the inflation button instead of the purge button can cause a rapid ascent. This is written by DAN in an Alert Diver article on buoyancy control published in 2011 and reviewed in March 2026.
The same text reminds us of a lesser-known point. A poorly connected inflator can make you heavy with no way to correct it.
The buoyancy compensator (also called a BCD or stab) deserves better than a rushed adjustment on the dock. Here we revisit size, straps, the inflator, weighting, and model choice, leaving aside weight-based size charts and average prices that circulate without sources.
What size buoyancy compensator should you choose?
The right size is the one that fits snugly against your torso, with your actual wetsuit on, without tightening your chest when the jacket is inflated. Each manufacturer publishes their own guide. A universal chart by body weight does not exist, and two brands can size very differently for the same chest measurement.
Always try the jacket on with your neoprene.
A model that is too large floats. It slips to the side when you go horizontal, the tank tips, and you spend the dive correcting your position. But too small, it compresses the rib cage as soon as the bladder fills. Inflate it fully during the fitting, then take a deep breath and see if the straps hinder your breathing. If yes, the size is not right.
Between a 3 mm wetsuit for the Red Sea and a 7 mm for the English Channel, the same diver may change size, and this is a good reason not to buy a jacket online without having worn it at least once with the gear of the season when you will dive the most.
For rental, the same logic applies. Ask the club for two sizes and compare them with your wetsuit.
How to adjust the straps and tank before gearing up?
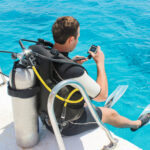
Start by attaching the tank to the back of the jacket, with the strap tightened well, before anything else. Then mount the regulator and open the valve. Put on the jacket, then adjust the shoulder straps, waist strap, and chest strap in that order, without cutting off your breathing.
The tank strap, on the other hand, sometimes simply loosens.
Many instructors wet the strap before tightening it, because a textile strap can loosen once in the water. Then lift the whole assembly by the handle. Nothing should slip. Also check the height of the tank, because a valve hitting the back of your head indicates an assembly that is too high. Too low, it pulls your legs down.
And once equipped, do the simple torso rotation test: if you cannot turn your head and grab your inflator with your left hand without searching, something is misplaced in the strap adjustment or in the routing of the hoses.
Make this adjustment dry. In the water, with gloves, everything takes longer.
What checks should be done on the inflator before immersion?
Connect the low-pressure hose to the inflator, valve open, then inflate and purge several times. The jacket should fill smoothly and empty as soon as you press the purge. Also test each purge on the jacket, high and low. Listen for any leak at rest.
DAN cites two specific errors.
The first is a low-pressure connection not properly engaged, leaving the jacket unable to inflate when you are too heavy. No way to compensate. The second is confusing the inflation button with the purge button, which turns a small correction into a rapid ascent. Identify the two buttons by touch before descending. Keep the inflator in the same place.
However, an inflator sticking in the open position is another scenario, rarer but serious, and this is precisely why you must know how to disconnect the hose with one gesture and purge at the same time, something your instructor can have you repeat in the pool before any sea outing.
A buddy check covers these points. Two minutes is enough.
How to check your weighting with the BCD?
The buoyancy test described by DAN is done at the surface, at the end of preparation, with the BCD completely emptied. Breathe in normally: the water should reach eye level. Exhale, and you should sink just below the surface. If you stay dry, you need more weight, and if you sink quickly, you have too much.
The BCD does not compensate for improper weighting.
In the article Weight Up published in 2014, DAN gives indicative starting points: about 10% of body weight with a 6 mm wetsuit, about 5% with a 3 mm. These are bases to adjust. Seawater requires more weight than freshwater, with the same suit thickness, and the same text also describes the effect of over-weighting. You have to add more air to the BCD. You become almost vertical. You offer more resistance to the water and consume more air. A well-distributed diving weight solves much of the issue.
However, integrated weight BCDs add a constraint that DAN clearly points out: where a belt has only one buckle, an integrated system can have multiple dump points, and your buddy must know them as well as you do before entering the water.
Show them to him at the briefing. He will know where to pull.
Wrap-around, back-inflate or hybrid: which BCD for your practice?
The wrap-around BCD, with its bladder around the torso, remains the most common in recreational diving and rentals. The back-inflate BCD, or wing, places the air behind you. This setup helps maintain a horizontal position and is mostly seen in technical diving, while hybrids mix the two.
No type suits everyone.
Buoyancy volume varies greatly from one model to another, so read it on the manufacturer’s sheet rather than in a comparison. Too much volume slows every correction. A wing designed for two tanks has no place on a recreational diver using a single 12-liter cylinder. For a first purchase, look at the placement of weight pockets, the number of D-rings to attach a deco buoy or a torch, ease of access to dumps, and travel weight. Also consider the standard. The European standard governing these BCDs is called EN 1809, and you can look for its mention on the label or in the manual.
Thus, the right BCD depends primarily on your practice: someone who dives two weeks a year in a club does not have the same needs as someone who chains deep dives with their own tank, and the price says almost nothing about this suitability.
How does the BCD help maintain buoyancy during the dive?
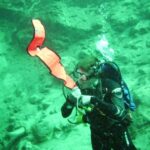
On descent, pressure compresses the air in the BCD and your suit, so you become heavier. You add small bursts of air to stay neutral. On ascent, the air expands and makes you lighter, so you purge progressively without waiting to be carried away. The lungs do the rest.
Yet the BCD is only one of the three elements DAN describes, along with weighting and lung volume.
Exceeding the planned depth because buoyancy slips increases decompression stress. Your reserve also runs out faster than expected. So watch your dive pressure gauge more often during your first dives with a new BCD, especially since consumption depends on the volume of your dive tank and its pressure. Stay away from the bottom. A badly placed fin kick damages fixed organisms, and we explain why you should never touch marine life.
In short, a few minutes of adjustment on dry land costs less than lost bars correcting a shaky position, and much less than a too rapid ascent.
FAQ
How do I know if my buoyancy compensator is the right size?
Put it on with your wetsuit, inflate it fully and take a deep breath. It should neither compress your chest nor slip to the side. Size guides vary by manufacturer, so don’t rely on a weight chart.
What is the difference between a jacket-style BCD and a wing?
The jacket-style BCD distributes air around the torso and dominates recreational diving. The wing places all the volume on the back, which helps maintain a horizontal position. It is mostly seen in technical diving.
How much weight is needed with a buoyancy compensator?
DAN provides indicative bases: about 10% of body weight with a 6 mm wetsuit and 5% with a 3 mm. Then check at the surface, with the BCD empty: the water should reach eye level when inhaling. Adjust with every change of suit or water.
What should be checked on the inflator before diving?
Check that the low-pressure hose is properly connected, then inflate and purge several times. Test each purge and locate the buttons by touch. A poor connection or confusion between inflation and purge are two errors noted by DAN.
Sources
- The Importance of Buoyancy Control (DAN, Alert Diver, 2011, reviewed in 2026)
- Weight Up! (DAN, Alert Diver, 2014)
{“@context”:”https://schema.org”,”@type”:”FAQPage”,”mainEntity”:[{“@type”:”Question”,”name”:”Comment savoir si mon gilet stabilisateur est à la bonne taille ?”,”acceptedAnswer”:{“@type”:”Answer”,”text”:”Enfile-le avec ta combinaison de plongée, gonfle-le à fond et respire profondément. Il ne doit ni comprimer ta poitrine ni glisser sur le côté. Les guides de taille varient selon les fabricants, donc ne te fie pas à une grille par poids.”}},{“@type”:”Question”,”name”:”Quelle différence entre un gilet enveloppant et une wing ?”,”acceptedAnswer”:{“@type”:”Answer”,”text”:”Le gilet enveloppant répartit l’air autour du torse et domine en plongée loisir. La wing place tout le volume dans le dos, ce qui aide à rester horizontal. On la voit surtout en plongée technique.”}},{“@type”:”Question”,”name”:”Combien de lest faut-il avec un gilet stabilisateur ?”,”acceptedAnswer”:{“@type”:”Answer”,”text”:”DAN propose des bases indicatives : environ 10 % du poids du corps avec une 6 mm et 5 % avec une 3 mm. Vérifie ensuite en surface, gilet vide : l’eau doit arriver au niveau des yeux en inspirant. Ajuste à chaque changement de combinaison ou d’eau.”}},{“@type”:”Question”,”name”:”Que vérifier sur l’inflateur avant de plonger ?”,”acceptedAnswer”:{“@type”:”Answer”,”text”:”Vérifie que le flexible basse pression est bien enclenché, puis gonfle et purge plusieurs fois. Teste chaque purge et repère les boutons au toucher. Un raccord mal fait ou une confusion entre gonflage et purge sont deux erreurs relevées par DAN.”}}]}