In 2012, the Alert Diver magazine from the Divers Alert Network set a simple benchmark to judge a good navigator. They must be able to swim about 90 meters in one direction, turn around, and return within 5 meters of their starting point. It sounds modest.
Imagine a hypothetical scene. You are ascending the slope of a wall, the boat is supposed to be to the north, and the terrain you thought you recognized no longer looks like anything. Your buddy is watching you. They are waiting for you to decide.
This guide summarizes what two DAN articles and the FFESSM training manual say about orientation. No miracle method, just skills to practice and questions to ask before signing up for training.
Why do we get lost so easily while diving?
We get lost because landmarks change appearance and the body deceives us. A rock seen on the way out does not look like the same rock seen on the way back, the current shifts your trajectory without you feeling it, and decreasing visibility erases the landscape. Add a touch of stress and direction becomes a guess.
DAN notes in a 2024 article: a terrain can look very different when seen from the opposite side.
Then comes the current. It pushes you sideways while you think you are going straight, and the deviation is only noticed when you look for the anchor point. Without visible bottom, you have no reference to measure this drift. Visibility works the same way. Murky water does not make a site dangerous in itself, but it deprives you of distant landmarks that help keep a course.
Moreover, the sense of direction we have on land works poorly underwater. You float, you turn around to look at a fish, and your brain loses track. In short, relying on your impression is the first trap.
Which natural landmarks to use to keep your course?
Natural navigation consists of moving from one landmark to another: a large boulder, a coral head, a wreck, a change in bottom from sand to rock. DAN talks about piloting, with control points spaced regularly. You add depth, slope, and light, which indicate where the shore is.
Choose your first landmark as you descend.
The 2012 article advises noting a striking element of the bottom upon arrival. It also mentions sand ripples, often parallel to the shore, and hollows left by the current. These clues remain tendencies. A bottom shaped by swirling swell or a jagged terrain can blur them, so check them with the compass before making them a rule.
The advice that changes everything is summed up in one gesture. After each landmark, turn around for a few seconds to look at it in the return direction, as recommended by DAN in 2024, because that is the image you will need to recognize when air runs low and fatigue sets in. You can also note two or three landmarks on a dive slate to keep track of the route. It’s rustic. It works.
But don’t grab a landmark to stop yourself: holding onto a rock covered with attached life damages it, and here’s why you should never touch marine life.
How to use a diving compass without making mistakes?
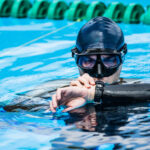
A compass is used to choose a direction and maintain it. You align the lubber line, that red or black line on the bezel, with your swimming axis, then you set the bezel on the needle. DAN reminds two conditions: hold the compass flat and keep it away from metallic objects that distort the reading.
The return is calculated before the dive. If you set off on a heading of 60, you will return on a heading of 240, which is the original heading plus 180 degrees. Note it on your slate. Under stress, even a simple addition can slip.
There remains the distance, which the compass does not provide.
Yet you can estimate it. The 2012 article suggests counting your fin strokes over a line of about 30 meters, and repeating the exercise four or five times at the bottom, because your speed underwater is nothing like your surface speed. Keep this number in mind. With it, a round trip becomes a calculation. And every air or depth check can include a glance at the heading, without having your nose glued to the instrument.
In the current, the rule changes a bit. DAN advises to keep the heading displayed on the compass and to orient your finning towards the current so that your actual movement follows the correct line. It is demanding, and a drift diving training facing the current teaches how to manage these situations with appropriate supervision.
What to do if you no longer know where you are?
Stop, stabilize your buoyancy and look at your buddy. Then check your air, your depth and your compass before choosing a direction. DAN emphasizes one point: when your feelings contradict your instruments, trust the instruments and your training rather than your intuition.
Disorientation is one of the classic triggers of panic.
Breathe slowly and wait a few seconds. Then compare what you see with the plan given at the briefing: mooring depth, side of the drop-off, return heading. If nothing matches, don’t circle around hoping to find the boat. Follow with your buddy the planned procedure, usually a controlled ascent with a safety stop, then a surface signal. Our article on managing stress and reacting better in difficult situations details these reflexes.
However, everything is decided before leaving. A briefing that gives neither heading, nor exit point, nor conduct to follow in case of separation leaves each buddy pair to improvise, and that is where most orientation errors begin. Don’t hesitate to ask the guide. At night, a well-chosen dive light helps to read the compass, but it does not replace this plan.
DAN finally reminds that wrecks, caves and ice ceilings require specific training. No technique in this article authorizes entry into them.
Which training to choose to learn orientation?
At FFESSM, orientation is part of the Level 2 PA20 curriculum: the technical training manual (October 2022 version) mentions understanding site landmarks and using a compass. At PADI, the Underwater Navigator specialty works on observation and compass navigation. The framework counts as much as the logo.
If you are a beginner, orientation is already practiced during the first natural environment dives after the pool, even if you remain guided.
Before signing up, ask the club some concrete questions. How many dives in the curriculum are really dedicated to navigation, with a round trip on the compass evaluated by the instructor? Are the exercises done on a known site, then on a new site? Does the instructor have you measure your fin strokes? How many students per instructor? A page promising autonomy in a weekend without detailing the program answers none of these questions.
Thus, real progress comes after the certification.
The DAN benchmark, a round trip of about 90 meters with less than 5 meters deviation, gives a measurable training goal, to work with your buddy on a calm site. We find it more honest than any promise of “never getting lost again.” The real cost is two or three dives dedicated to the exercise rather than to the stroll: it is the price of a return to the boat without a long surface swim.
FAQ
Do you need a compass for guided diving?
When a guide leads the dive group, they manage the navigation. Having your own compass still allows you to follow the route and practice. The day you dive independently, you’ll already know how to use it.
How to calculate the return bearing?
Add 180 degrees to the outbound bearing if it is less than 180, subtract 180 if it is greater. An outbound bearing of 60 gives a return bearing of 240. Calculate it before entering the water and write it on your slate.
How to measure the distance traveled during a dive?
Count your fin strokes over a known distance, for example a line about 30 meters long, repeating the exercise several times at the bottom. DAN reminds that your speed underwater differs from surface speed. This figure remains indicative and varies with current and fatigue.
What to do if I lose my buddy and become disoriented?
Stop, check your air and depth, then follow the separation procedure announced during the briefing. Most often, it involves a short search followed by a controlled ascent with a safety stop. Do not prolong a random search.
Sources
- Underwater Navigation (Mike Ange, Divers Alert Network, Alert Diver, 2012)
- Advanced Underwater Navigation (Kyle Kray, Divers Alert Network, Alert Diver, 2024)
{“@context”:”https://schema.org”,”@type”:”FAQPage”,”mainEntity”:[{“@type”:”Question”,”name”:”Faut-il un compas pour plonger encadré ?”,”acceptedAnswer”:{“@type”:”Answer”,”text”:”Quand un guide mène la palanquée, c’est lui qui gère la navigation. Avoir ton propre compas te permet quand même de suivre le parcours et de t’entraîner. Le jour où tu plongeras en autonomie, tu sauras déjà t’en servir.”}},{“@type”:”Question”,”name”:”Comment calculer le cap de retour ?”,”acceptedAnswer”:{“@type”:”Answer”,”text”:”Ajoute 180 degrés au cap d’aller s’il est inférieur à 180, retire 180 s’il est supérieur. Un aller au cap 60 donne un retour au cap 240. Calcule-le avant la mise à l’eau et note-le sur ton ardoise.”}},{“@type”:”Question”,”name”:”Comment mesurer la distance parcourue en plongée ?”,”acceptedAnswer”:{“@type”:”Answer”,”text”:”Compte tes cycles de palmage sur une distance connue, par exemple une ligne d’environ 30 mètres, en répétant l’exercice plusieurs fois au fond. Le DAN rappelle que ta vitesse en immersion diffère de celle de surface. Ce chiffre reste indicatif et varie avec le courant et la fatigue.”}},{“@type”:”Question”,”name”:”Que faire si je perds mon binôme et que je suis désorienté ?”,”acceptedAnswer”:{“@type”:”Answer”,”text”:”Arrête-toi, vérifie ton air et ta profondeur, puis applique la procédure de séparation annoncée au briefing. Le plus souvent, elle prévoit une courte recherche puis une remontée contrôlée avec palier de sécurité. Ne prolonge pas une recherche au hasard.”}}]}